Seeker Strategy Guide
MECCHA CHAMELEON Seeker Guide: How to Play, Spotting Disguises, and Mastering the Missed Spot Ranking
In MECCHA CHAMELEON, the Seeker (often called the "Hunter" or "It" by the community) is the role tasked with hunting down the Hiders. You scan the environment in first-person without a flashlight, relying solely on your eyes to pick out players disguised as walls, props, or graffiti, and then eliminate them with your gun. This guide focuses on practical, actionable techniques: how to spot the flaws in a disguise, how to conduct a systematic room-by-room search, how to use the post-match results screen and "Missed Spot" rankings to improve, how to aim efficiently, and the specific pacing required for Infection and Double modes. Even a beginner can use these tips to start hunting like a pro.
On This Page
- The Basics: You Are the Seeker on a Clock
- Core Strategy: Look for Shapes, Not Just Colors
- Systematic Partitioned Searching, Not Random Running
- Using the Post-Match Reveal for Review
- The Missed Spot Mechanism and Toggles
- Search Pacing for Infection and Double Modes
- Audio Cues and General Search Heuristics
- Confirmation Shots and Time Management: Don't Waste a Bullet
- Frequently Asked Questions
The Basics: You Are the Seeker on a Clock
Let’s clarify the rules first so the techniques make sense. At the start of a match, players are divided into Hiders and Seekers. During the preparation phase, Hiders move freely, choose their spots, paint their bodies, and lock in their poses. As noted by the community, Seekers are confined to a spawn area during this time and cannot see where the Hiders are going. Once the prep phase ends, you are released, and the timed hunt begins.
In MECCHA CHAMELEON, there are three core constraints for the Seeker: First, you are in first-person view with no flashlight, relying entirely on ambient light and your own eyes; second, you must shoot the target to eliminate them (as the developer states, "found players are out when shot with a gun"), so seeing them isn't enough—you have to land the shot; third, it is a race against the clock. You must find all Hiders before the timer hits zero to win; if even one Hider survives until time runs out, the Hiders win the match.
Note that the exact duration of the prep and hunt phases has not been officially disclosed and likely varies based on the mode and host settings. Don't rely on a fixed "time remaining" as common knowledge; instead, make it a habit to glance at the timer at the start of the match and adjust your aggression accordingly. The three modes (Normal, Infection, and Double) are selected by the host in the lobby along with the map, and the pacing varies significantly. For the basics, check out the Gameplay Systems page, or visit the official Steam store page for the original description.
Core Strategy: Look for Shapes, Not Just Colors
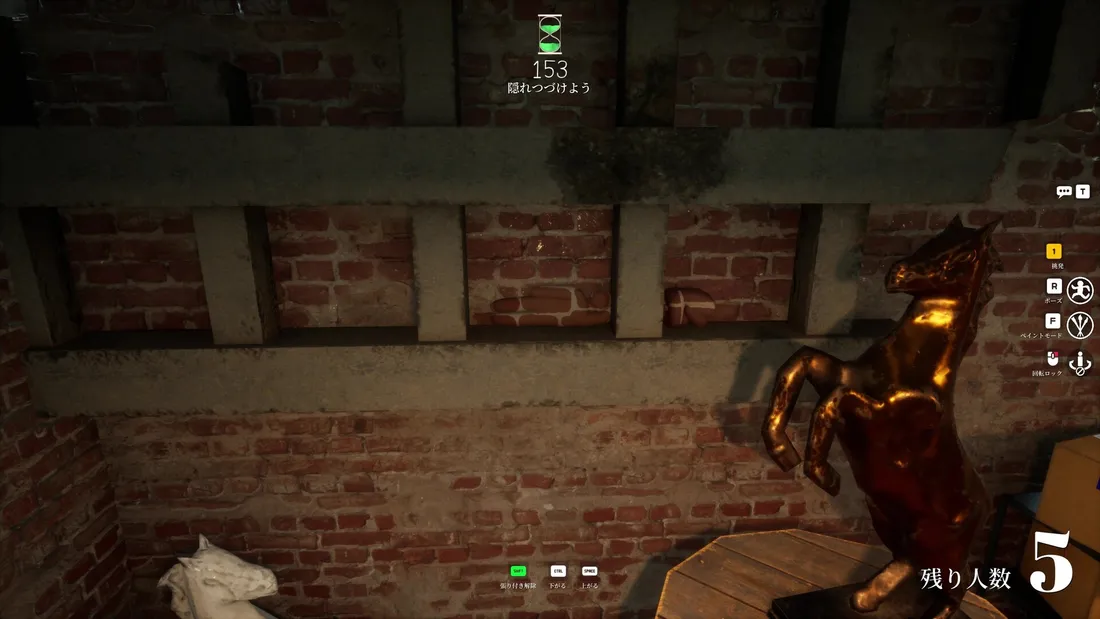
The biggest mistake beginners make is staring only at the colors. The problem is that Hiders spend the entire prep phase using the color palette and eyedropper to make their colors near-perfect. If you rely on color matching, you’ll run out of time. The truly efficient approach in MECCHA CHAMELEON is to look for shapes, not just colors: no matter how well-disguised a player is, their body is still human-shaped. The flaws lie in the silhouette and details, not the color itself.
According to media and community players, prioritize looking for these types of flaws:
- Incorrect Spacing: Paintings on a wall or boxes on a shelf are usually arranged in a pattern. If the spacing between "props" is wider or narrower than the rest, it’s likely a player wedged in there.
- Broken Symmetry: In objects that appear in pairs (two pillars, symmetrical decorations, a row of identical chairs), if there’s an extra one or one that is a different size, it’s worth a test shot.
- Gloss and Shadow Mismatches: A reflection on a matte wall, or a surface where the lighting doesn't match the surrounding light source, is the hardest part of a disguise to get right. Even if the Hider matches the color, they often can't match the reflective texture.
- Too Centered, Too Clean, Too New: An object that appears out of nowhere in the middle of a room, a piece of wall graffiti that looks newer than its surroundings, or a shape with unusually sharp edges are all suspicious signals.
Don't just stand in the middle of the room spinning around. Instead, move slowly along the walls in first-person, letting the silhouettes of objects move horizontally across your field of view. The human eye is particularly sensitive to shapes that don't "flow" correctly when moving. Scanning slowly along the wall makes it much easier to spot an out-of-place shape than standing still. To understand the Hider's mindset, read the Hiding and Camouflage Tips page; knowing what they are thinking helps you know where to look.
Systematic Partitioned Searching, Not Random Running
Many Seekers lose because they run around blindly, jumping between rooms and glancing at every corner without actually checking anything. A more stable approach is to treat the search like a sweep: divide the map into sections, check them one by one, and move on only after a section is cleared, keeping track of which areas are finished.
The benefit of partitioned searching is controlled coverage. We recommend this rhythm:
- At the start, do a quick lap to note complex, cluttered areas with high visual density—these are the Hiders' favorite spots.
- Start from an entrance and move through rooms and walls in a fixed clockwise or counter-clockwise direction. Don't jump back and forth.
- In each area, focus on four spots: shadowed corners (Seekers have no flashlight, so dark areas are a huge advantage for Hiders), prop piles and shelves, rows of repeating items, and wall art/graffiti/signs.
- Check off the area in your mind and don't backtrack unless you have an audio cue.
Also, build a "player profile." Community feedback suggests Hiders have common habits: they favor specific safe corners, love blending into repeating props, and often make tiny, involuntary movements when you get close. Keep these in mind, pause for two seconds in high-traffic spots during your sweep, and shoot at anything that looks like it just twitched. Efficiency will be much higher than relying on luck. High-risk areas vary by map; check the Maps and Environments page for specific hiding tendencies.
Using the Post-Match Reveal for Review
Every match of MECCHA CHAMELEON ends with a post-match reveal screen that shows exactly where every Hider was hiding and what they looked like. While the community considers this the funniest part of the game, for a Seeker looking to improve, it is a free after-action report.
Don't just laugh and move on; develop these two review habits:
- Remember Positions: Note the specific spots where players were hiding that you missed. High-frequency hiding spots on a map are highly repetitive; remember them once, and you'll know where to check first next time.
- Remember Techniques: Observe why a disguise fooled you—was it the color, the silhouette, or the angle they pressed against the wall? Next time you see a similar prop, you'll instinctively take a second look.
This review process pairs with the "Missed Spot" ranking: the reveal screen tells you where the answers were, and the ranking tells you how many you missed and in what types of locations. Comparing the two for a few matches will quickly increase your map familiarity, and your search speed will reflect in your ability to clear the map before the timer hits zero.
The Missed Spot Mechanism and Toggles
Starting from v1.2.0, the game added a Missed Spot system that shows you Missed Spots and Missed Enemies at the end of the match. Essentially, it's a list of what you missed, designed for Seeker review.
The iteration history is worth noting:
- v1.2.0: Added a ranking based on the distance and duration Hiders stayed within the Seeker's line of sight, along with the Missed Spot info.
- v1.2.1: Added a toggle to show or hide the Missed Spot list.
- v1.2.2: Added a dedicated button to hide the ranking.
How to use it? When you want to improve, keep it on and compare it with the post-match reveal to focus on the types of spots you repeatedly miss (like ignoring overhead pipes or getting fooled by wall graffiti). If you're playing with friends and don't want spoilers for the next round, or if you feel the list affects your mindset, use the v1.2.1 toggle or v1.2.2 button to turn it off or hide it. Note that the exact scoring formula for line-of-sight ranking has not been officially disclosed, so don't obsess over the specific score—use it as a directional tool for finding your blind spots.
Search Pacing for Infection and Double Modes
Normal mode is the classic timed hunt, where the partitioned search and shape-finding tips apply directly. However, the pacing for Infection and Double modes is completely different, and you need to adjust your mindset.
Infection Mode: Hiders who are caught turn into Seekers, causing the number of Seekers to snowball. You might start alone, but once you catch the first person, the tide turns. The key here is team coordination to compress space: don't crowd into one room once there are multiple Seekers. Spread out to surround the remaining Hiders, forcing them into corners and dead ends, gradually shrinking their movement and re-hiding space. Community feedback suggests this mode is most intense with 6 to 10 players, where the snowball effect and tension of the hunt really shine.
Double Mode: Everyone hides together first, then everyone becomes a Seeker at the same time to see who can find everyone the fastest. This is essentially a speedrun. There is no room for waiting for the opponent to make a mistake; your systematic scanning efficiency and memory of hiding spots determine the winner. The post-match review and map knowledge are most rewarding here: whoever knows the map best clears the field first. If you play Double, we highly recommend grinding the same map to memorize the spots. For specific rule differences between the three modes, see the Gameplay Systems page.
Audio Cues and General Search Heuristics
The developer hasn't released precise values for finding players, but the Prop Hunt genre has a set of mature search heuristics that work perfectly in MECCHA CHAMELEON.
First is audio cues. The game added proximity voice chat in v1.1.0 (you hear it when close, not when far). This is a double-edged sword: Hiders talking to each other, taunting you, or even laughing can reveal their general location. As a Seeker, lower your own noise, listen for sudden voices or environmental anomalies, and follow the sound—it's often faster than relying on your eyes alone.
Second, here is a general "suspicious" checklist derived from Prop Hunt genre knowledge, which you should keep in mind while hunting:
- Extra Props: How many chairs or boxes should be in this room? If there's one extra, shoot it.
- Broken Symmetry: If pairs or rows suddenly become odd numbers, or one item is slightly larger or tilted, it's suspicious.
- New Stains or Graffiti: In maps where graffiti is a feature (like the Sewers), Hiders will paint themselves to match. Look for graffiti that looks like it appeared today or stains with unusually sharp edges.
- Too Intentional: Objects that are too centered, too clean, or blend too perfectly into the environment are the most suspicious.
By layering audio cues and this checklist onto your partitioned search, you'll have a method that doesn't rely on luck. Combine this with post-match reveals and Missed Spot reviews, and your hunting will become increasingly consistent. For questions about multiplayer and room settings, see Multiplayer and Online.
Confirmation Shots and Time Management: Don't Waste a Bullet
Finding a player is only half the battle; landing the shot is what counts. Since you must hit the target to eliminate them, your aim is just as critical as your search. Specific settings like ammo count, reload times, or fire intervals have not been officially disclosed, but based on Prop Hunt genre knowledge and community feedback, these habits will help you avoid pitfalls.
First, confirm before you shoot. When you suspect an object is a player, instead of panic-firing, step closer and change your angle to see if the silhouette or reflection gives them away. Confirm before pulling the trigger. Missing a shot not only wastes time, but the gunshot and movement might alert other Hiders nearby that you're in the area.
Second, prioritize by confidence. If there are multiple suspicious targets in your field of view, shoot the one you are most sure about first, and leave the ambiguous ones for when you get closer. Clear the confirmed targets in an area first, and the remaining suspicious points will become more obvious by comparison.
Third, adjust aggression based on the timer. If you have plenty of time at the start, be steady and clear the area systematically. As you get closer to zero, be decisive. For every object that "doesn't look quite right," it's better to waste a shot testing it than to let the last Hider steal the win by stalling. As mentioned, if even one person survives until time runs out, the Hiders win. Pacing management in the final stages often decides the match. This logic is especially important in the speed-based Double mode.
Frequently Asked Questions
Do Seekers have a flashlight? How do I find people in the dark?
How do I tell which object is a disguised player?
Can the Missed Spot ranking be turned off?
How long is a match, and how long do I have to find everyone?
Updated on 2026-06-16